Reclaimed Wyoming Snow Fence Boards
October 17, 2017

As your local connection for Reclaimed Products, Sears Trostel is the place to find lumber, beams and other pieces collected from time-worn structures. Reclaimed elements lend a sense of warmth, character and history to interior and exterior projects ranging from traditional to modern styles.
And now, Sears Trostel is a distributor of Reclaimed Wyoming Snow Fence Boards in Colorado. Â
Untreated and not exposed to lead paint or VOCs, as well as being highly durable, make snow fence wood an excellent choice for use on interior walls and ceilings, commercial installations, furniture, exterior siding, and more. The natural patina is rich in texture and eliminates the need for staining.
Aged and cured by years in the sun, wind, rain and snow, the boards are insect-free without kiln-drying.

In stock at our Riverside location:
Special orders of rough and thin resawn boards, and custom orders of tongue & groove, shiplap and bevel lap are available now.
Â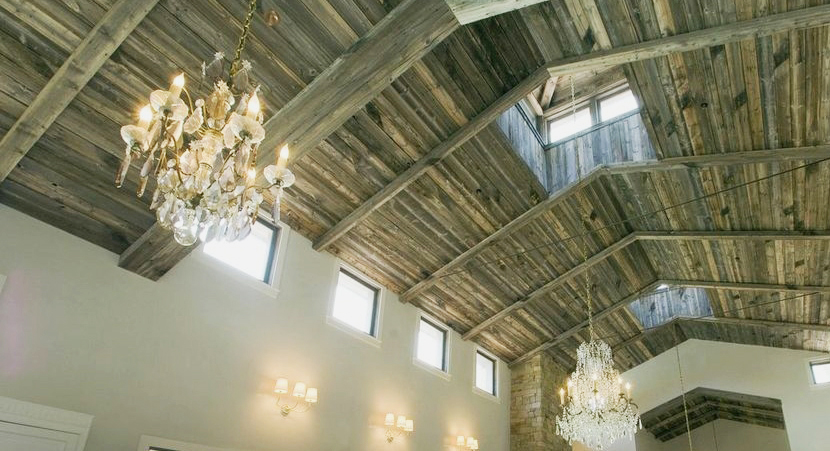 Â
Â
We currently stock the Laramie finish. Other finishes are available with special order.

.jpg)
Come to Sears Trostel for a large variety of Reclaimed Products.Â
Lumber, beams, mantels, live-edge wood slabs, sinker cypress, gray timber, beetle kill pine, and corrugated tin.Â
Learn more about our reclaimed products and creative ways to use them.
Read More...
And now, Sears Trostel is a distributor of Reclaimed Wyoming Snow Fence Boards in Colorado. Â
Untreated and not exposed to lead paint or VOCs, as well as being highly durable, make snow fence wood an excellent choice for use on interior walls and ceilings, commercial installations, furniture, exterior siding, and more. The natural patina is rich in texture and eliminates the need for staining.
Aged and cured by years in the sun, wind, rain and snow, the boards are insect-free without kiln-drying.
In stock at our Riverside location:
- Rough 1x6 boards — de-nailed with two beautifully-varied sides of colorÂ
- Thin 1/4†resawn boards — smooth-backed for easy installation on walls using nails or glue
Special orders of rough and thin resawn boards, and custom orders of tongue & groove, shiplap and bevel lap are available now.
Â
Reclaimed wood is a popular sustainable trend in interior design and architecture, and snow fence wood is perfect for commercial projects seeking LEED certification. It is certified by the Forest Stewardship Council (FSC) and listed under the 100% Recycled Content classification.
Â
Â
We currently stock the Laramie finish. Other finishes are available with special order.
Come to Sears Trostel for a large variety of Reclaimed Products.Â
Lumber, beams, mantels, live-edge wood slabs, sinker cypress, gray timber, beetle kill pine, and corrugated tin.Â
Learn more about our reclaimed products and creative ways to use them.
How to Install Crown Moulding
by This Old House - 6/19/2009
Modern crown moulding can be traced to the late Renaissance, when designers adapted elements of Greek and Roman architecture to ornamental plaster and wood cornices used to disguise and beautify the juncture of ceiling and wall.Â
Â
Installing crown is only slightly more complicated than running baseboard. The variety of different joints and saw cuts, including a coped corner joint, and outside miter, a square cut, and a scarf joint, are best done with a coping saw and power miter saw. With practice, you should be able to make tight, long-lasting joints.Â
Â
Tools & Supplies for This Project
- Power miter saw with 10" carbide-tipped blade
- Drill/screwdriver for drilling pilot holes for nails
- Tape measure
- Pneumatic finishing nailer with 1 1/2" to 2" finish nails to fasten mouldings to wall
- Framing square for laying out moulding on walls and ceilings
- Chalk line for snapping installation lines on the wall
- Coping saw for coping moulding at inside corners
- Utility knife for trimming coped joints
- Wood rasp for fine-tuning coped joints
- Electronic stud-finder for locating studs and joists
- Hammer
- 4d, 6d and 8d finish nails
- 1/16" drill bit
- Wood putty for filling nail holes
- Acrylic or other flexible caulk to seal gaps between moulding and walls and ceiling
- Carpenter's glue for adhering outside corners and returns
Â
To determine how much moulding to buy, measure each wall, round up to the next foot, and mark those measurements on a plan-view sketch of the room you're working in. If one wall measures within a few inches of the length of a full piece of crown, buy the next longer length. When the wood arrives at your site, number the back of each piece with a pencil to correspond with the numbers indicated on your plan-view drawing.Â
Â
The first piece installed will be square-cut on each end. Each subsequent piece will typically have one end that is square cut and another end that is coped or mitered. In some cases, the end opposite the cope will have to be mitered to help make an outside corner. When a length of moulding is coped on one end, cut the coped end first. Once the coped end fits tightly, mark and cut the opposite end, whether it's a miter or a square cut.
Â
Step one: lay out the moulding
Â
Determine the order in which each piece of moulding will go up around the room by drawing a plan-view of the room on paper. To avoid having to cope both ends of the last length of moulding, install the outside corner last. Otherwise, number each wall counterclockwise, starting with the one opposite the door.
Â
Hold a scrap piece of moulding in place at each inside and outside corner and mark the position of its bottom edge - the edge that sits on the wall - with a pencil. Stretch a chalk line between the marks at each corner and snap lines along the wall. This is the installation line.Â
Â
Locate studs and joists. Mark their locations with a pencil just below the installation line.
Â
Step two: install the first length
Â
Measure the wall for the first moulding piece. Transfer this measurement to the wood, then use a power miter saw to cut the moulding square at each end.
Â
Align the wood with the chalk line from Step 1. Working from the center, drive 8d finish nails through the moulding - 1/2 inch from the bottom edge and 1/2 inch from the top edge - into each stud and joist. Near the ends, drill 1 1/6 inch pilot holes for 4d or 6d finish nails.
Â
If necessary, splice two piece with a scarf joint centered over a stud. Set the saw to a right-hand 45-degree setting. Hold the first moulding piece to the right of the blade and cut. Hold the adjoining piece to the left of the blade and cut. Pilot a hole in the overlapping moulding, 1/2 inch to the side of the joint, and attach with 6d finish nails.
Â
Step three: cut inside corner joint
Â
Coping is the process of cutting the end of a moulding to mimic the profile milled into its face. Coped cuts are used where one piece of crown moulding meets another at an inside corner.Â
Â
Place a length of crown moulding upside down on the miter saw so that the bottom edge of the moulding - the edge that will sit on the wall - rests against the fence, and the top edge - the one that goes on the ceiling - rests against the table.
Â
Set the saw to 45-degrees, swing the saw left for a left-side coped corner, and vice versa for a right corner. When you make the cut, the long point of the miter should be on the back of the moulding, not on the face.
Â
Step four: highlight cut line with pencil
Â
After mitering the end of the crown moulding, use a pencil to mark the edge on the face of the miter cut. This easy-to-see highlight will serve as your coping-saw cut line.
Â
Step five: cope inside corner joint
Â
To create a snug-fitting joint, hold a coping saw at a 5-degree angle away from the face of the moulding and carefully cut along the pencil-marked edge. Check for a tight fit by bringing the moulding to the wall and sliding it in place. If necessary, use a wood rasp or utility knife to pare away excess wood.
Â
Before attaching the piece to the wall, determine if its uncut end will land at an inside or outside corner. For an outside corner, proceed to Step 6. For an inside corner, measure from the top of the first piece you installed (Step 2) to this corner. Transfer that measurement to the coped moulding by hooking the measuring tape on its top edge. Mark the length to the inside corner. Using the miter saw, make a square cut on that mark and nail the moulding up, as in Step 2.
Â
Step six: mock-up an outside corner
Â
To measure a coped piece of moulding that ends at an outside corner, make a mock-up of the corner from two 12 inch long moulding scraps. Make an outside miter cut on one piece, as in Step 3. Repeat this process for the second scrap piece, but rotate the saw blade to the opposite 45-degree angle. Glue and nail the pieces ends together.Â
Â
Hold the mock-up in place and mark the ceiling where the two pieces of moulding come together.Â
Â
Measure from the top edge of the first piece you installed (Step 2) to the ceiling mark. Transfer that measurement to the coped length of moulding (Step 3). Swing the saw back to its original 45-degree position and cut the moulding to length.
Â
Step seven: installing an outside corner
Â
If the other side of the corner will butt into an inside corner that does not require a coped end, first repeat the measuring and cutting sequence to complete the outside corner, making sure to rotate the saw blade to the opposite 45-degree angle. Then measure for and cut the butt end. Align the piece on the wall, spread glue on the surfaces of the miter, and nail the moulding into place as in Step 2, fastening the corners together as you did on the mock-up.Â
Â
If the other side of the corner will butt into an inside corner that does require a coped end, repeat Steps 3-5 first, then complete the outside corner as above.
Â
Step eight: cutting and fastening a return
Â
Continue working around the room, coping inside corners and mitering outside corners.Â
Â
If the ceiling height changes and the moulding must end in the middle of the wall, cap it with a return. First, make an outside miter cut, and in Step 6, at the point where the ceiling height changes. Then, take a moulding scrap at least a foot long and cut an outside miter on its end. To make the wedge-shaped cap, set the saw to 90-degrees and hold the scrap with its back flat on the saw table, cutting the piece so that it comes to a point at the bottom edge. Avoid splitting the small piece by gluing the return rather than nailing it.
Â
~ This Old HouseÂ
Finger-Joint Double-Primed Poplar
August 15, 2017
Sears Trostel Finger-Joint Double-Primed Poplar (FJDPP) makes your job EASIER and helps save TIME and MONEY, too.
FJDPP is a strong, durable hardwood product that helps construction and DIY projects come to life faster with less waste, and is a better alternative to MDF or Primed Pine.
Now FJDPP eased-edge base and case moulding, and S4S boards, are in stock at our Riverside location at a very attractive price point.
Commonly referred to as ‘painters wood', Poplar is a naturally smooth, straight wood that is less affected by humidity and other atmospheric conditions compared to other woods.
Â
Finger-joint Poplar is an even better option than solid Poplar. The best parts of the wood — where knots, wane and other imperfections are cut away — are adhered together to create a bond that has a structural integrity greater than solid Poplar. The jointing process produces a straighter, flatter board and the whole piece is useable. With this in mind, you may choose to purchase less product for a project, and have less waste on the job site.
While single-sanding and single-coating is the industry standard for primed poplars, each board of Sears Trostel’s premium finger-joint Poplar is double-sanded to an exceptionally smooth finish, and two coats of primer are applied to all four sides. This ensures the best surface for painting, requires less paint for good coverage, and can help you complete your project in less time.
Stop by Sears Trostel to pick up Finger-Joint Double-Primed Poplar or call to schedule quick delivery.
Â
 Sears Trostel Finger-Jointed Double-Primed Poplar is the preferred and affordable alternative to Medium-Density Fiberboard (MDF) and Primed Pine. Why?
Â
Read More...
FJDPP is a strong, durable hardwood product that helps construction and DIY projects come to life faster with less waste, and is a better alternative to MDF or Primed Pine.
Now FJDPP eased-edge base and case moulding, and S4S boards, are in stock at our Riverside location at a very attractive price point.
Commonly referred to as ‘painters wood', Poplar is a naturally smooth, straight wood that is less affected by humidity and other atmospheric conditions compared to other woods.
Â
Finger-joint Poplar is an even better option than solid Poplar. The best parts of the wood — where knots, wane and other imperfections are cut away — are adhered together to create a bond that has a structural integrity greater than solid Poplar. The jointing process produces a straighter, flatter board and the whole piece is useable. With this in mind, you may choose to purchase less product for a project, and have less waste on the job site.
While single-sanding and single-coating is the industry standard for primed poplars, each board of Sears Trostel’s premium finger-joint Poplar is double-sanded to an exceptionally smooth finish, and two coats of primer are applied to all four sides. This ensures the best surface for painting, requires less paint for good coverage, and can help you complete your project in less time.
Stop by Sears Trostel to pick up Finger-Joint Double-Primed Poplar or call to schedule quick delivery.
Â
Sears Trostel Finger-Jointed Double-Primed Poplar is the preferred and affordable alternative to Medium-Density Fiberboard (MDF) and Primed Pine. Why?Â
- Poplar is significantly more stable than Pine, experiencing less shrinkage and swelling
- Poplar is a harder wood and produces straighter boards than Pine
- Poplar is real wood and adds more value and durability to a project than MDF
- Poplar is easier to paint and finish than MDF
- Poplar stands up to moisture, when MDF will begin to break down
Check out our NEW low pricing on all our Primed Poplar products. Â
Trex & Ipe: The Better Decking Solutions
August 4, 2017
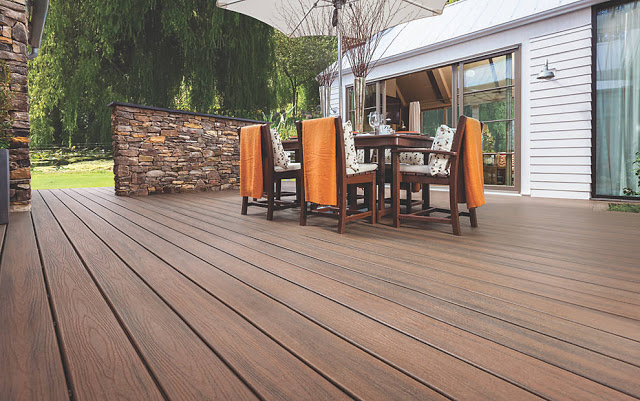
(Trex Transcend® in Spiced Rum)
BEAUTIFUL SUNNY DAYS. That is just one of the great things about living in Colorado. How many days is disputed, but those of us who live here know that gloomy days are few. All that sun allows us to enjoy spending time on a deck or porch all year around. But sun and other weather, particularly at high elevations, is not a friend to traditional decking materials.
Pressure-treated wood, cedar and redwood require regular maintenance to keep them looking good, and even with maintenance, have a short life-span compared to other choices available.
Sears Trostel now carries two of the BEST decking solutions for long-lasting, low-maintenance outdoor spaces..jpg)
Trex Transcend® in Island Mist
Trex® High-Performance Composite Decking
Made of 95% recycled wood, sawdust and recycled plastic film, Trex is a low-maintenance, eco-friendly material with the deep-grain look of wood. Its list of attributes make it hard to beat for creating a gorgeous outdoor enviroment that will stay that way for decades — with minimal help from you.
Â
Trex offers a Good-Better-Best lineup of style, color, protection and price options to suit all kinds of households and budgets.Â
Â
As a Trex retailer, Sears Trostel sells the whole line of Trex products — including decking, railings, trim, pergolas, and lighting.Â
Talk with one of our knowledgeable associates to learn more about the whole Trex product line and the virtues of Ipe wood for decking and more.Â
Â

Ipe wood outdoor mural at Denver Union Station, by Sears Trostel
Read More...
BEAUTIFUL SUNNY DAYS. That is just one of the great things about living in Colorado. How many days is disputed, but those of us who live here know that gloomy days are few. All that sun allows us to enjoy spending time on a deck or porch all year around. But sun and other weather, particularly at high elevations, is not a friend to traditional decking materials.
Pressure-treated wood, cedar and redwood require regular maintenance to keep them looking good, and even with maintenance, have a short life-span compared to other choices available.
Sears Trostel now carries two of the BEST decking solutions for long-lasting, low-maintenance outdoor spaces.
Trex Transcend® in Island Mist
Trex® High-Performance Composite Decking
Made of 95% recycled wood, sawdust and recycled plastic film, Trex is a low-maintenance, eco-friendly material with the deep-grain look of wood. Its list of attributes make it hard to beat for creating a gorgeous outdoor enviroment that will stay that way for decades — with minimal help from you.
Â
- Available in 18 decking colors & 7 railing colors
- Won’t warp, rot, crack or split
- Mold & mildew resistant
- Fade & stain resistant
- Splinter-free
- Termite & insect resistant
- Clean it with soap and water
- Backed by a 25-year limited residential fade and stain warranty
Trex offers a Good-Better-Best lineup of style, color, protection and price options to suit all kinds of households and budgets.Â
Â
- Good — Trex Select®
- Better — Trex Enhance®
- Best — Trex Transcend®
As a Trex retailer, Sears Trostel sells the whole line of Trex products — including decking, railings, trim, pergolas, and lighting.Â
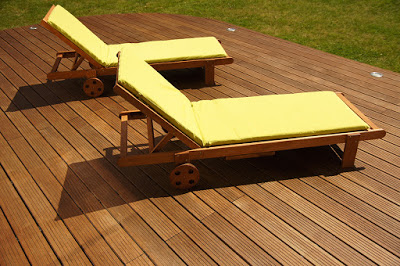
Ipe Wood
Ipe wood (pronounced eee-pay) is an exotic hardwood that is extremely hard and dense, and is resistent to decay, rot and insects. Its also known as Brazilian Walnut, though not actually related to Walnut trees of the Juglans species.
Its rich color and incredible strength, hardness and durability make it an excellent option for decking, flooring and fencing. Naturally slip-, scratch- and weather-resistant, an Ipe wood deck will retain its beauty and structure for 25+ years with occasional oiling to help the hues pop.
Â
Talk with one of our knowledgeable associates to learn more about the whole Trex product line and the virtues of Ipe wood for decking and more.Â
Â
Ipe wood outdoor mural at Denver Union Station, by Sears Trostel
The Magic of Mouldings & Millwork
July 17, 2017
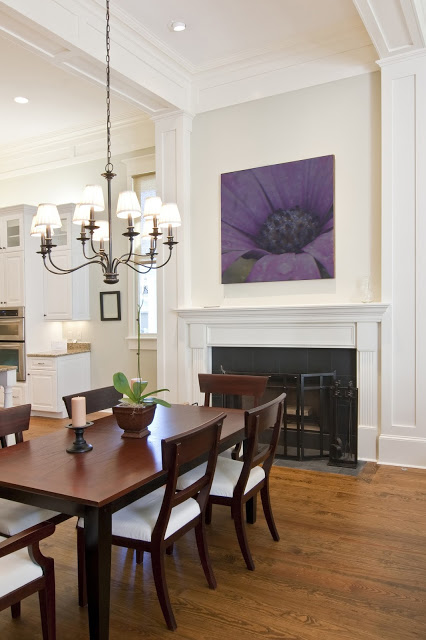
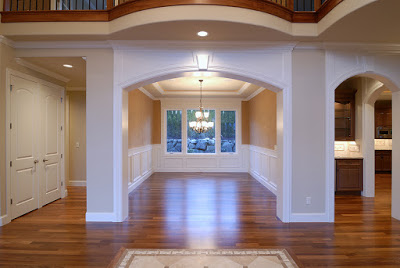
While often the forgotten star of the show, when it comes to home interiors, mouldings and millwork can make a room go from blah to ‘a-ha!’ in moments.
Also known as ‘trim’, the choice of moulding around windows, floors and ceilings, as well as other types of millwork, create the character of a home.  They add architectural interest to a room, provide proportion and depth to ceilings and doors, and help windows pop. It’s the behind-the-scenes magic that makes a room.
Here at Sears Trostel, we are your local experts on mouldings & millwork. With a 5,000-piece moulding library, and a super-fast Lean Manufacturing process, we have all the millwork resources for DIYers and contractors to bring life to remodeling projects, new homes and office spaces. Plus, deliver quickly.
We offer several moulding and millwork solutions:
Learn about the basic moulding elements and how they work together in the article below.
Â
Interior Trim: 8 Must-Know Elements
Â
Talk with our knowledgeable staff to discuss the details in creating your own moulding magic.
Â
Moulding or Molding…which is it?
The term ‘moulding’ goes back in history to the early British and their love of crown moulding and other ornate trim. They spelled it this way and still do. Over the years in the United States, the use of the spelling ‘molding’ has become more of the norm, but there are still many of us in the industry who prefer the traditional spelling. We like the historical reference, and that our high quality millwork doesn’t conjure images of blue cheese.Â
You should feel free to spell it any way you like.
Â

Read More...
Also known as ‘trim’, the choice of moulding around windows, floors and ceilings, as well as other types of millwork, create the character of a home.  They add architectural interest to a room, provide proportion and depth to ceilings and doors, and help windows pop. It’s the behind-the-scenes magic that makes a room.
Here at Sears Trostel, we are your local experts on mouldings & millwork. With a 5,000-piece moulding library, and a super-fast Lean Manufacturing process, we have all the millwork resources for DIYers and contractors to bring life to remodeling projects, new homes and office spaces. Plus, deliver quickly.
We offer several moulding and millwork solutions:
- Classic & Mountain Series Moulding — Our in-stock collections of moulding with several industry standard profiles, as well as other distinctive designs. The collection includes building blocks, such as back bands and base caps, to make your own moulding ‘build-ups.’ Produced in a variety of sizes and wood species, it is easy to mix and match moulding profiles to create a unique design. Add tongue & groove wainscot paneling for a finished, elegant look and provide wall protection in high traffic areas.
Learn about the basic moulding elements and how they work together in the article below.
Â
Interior Trim: 8 Must-Know Elements
Â
- Custom Mouldings — Need your own exclusive profile? We can manufacture custom mouldings to your exact specifications. Just draw a profile, choose the size, wood species, grade of wood, lineal footage needed — and we’ll deliver it fast.
Â
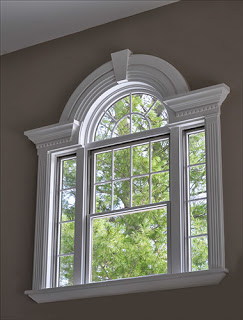
- Arched & Curved Mouldings — Add some ‘curve’ appeal! Sears Trostel manufactures casing
Âfor arch-top doors and windows, curved base and crown mouldings, curved hand and bar rails, tapered treads for spiral staircases, arched door jambs and more.
- Custom Millwork Services —  High-end Flat Panel wood paneling. Custom shaping and planing. Custom hardwood flooring. We offer a variety of millwork services to help your projects come to life.Â
Talk with our knowledgeable staff to discuss the details in creating your own moulding magic.
Â
Moulding or Molding…which is it?
The term ‘moulding’ goes back in history to the early British and their love of crown moulding and other ornate trim. They spelled it this way and still do. Over the years in the United States, the use of the spelling ‘molding’ has become more of the norm, but there are still many of us in the industry who prefer the traditional spelling. We like the historical reference, and that our high quality millwork doesn’t conjure images of blue cheese.Â
You should feel free to spell it any way you like.
Â