Adventures in veneering
September 8, 2012
I know, It's been a while since the last post here... It's been busy here at Sears Trostel, what can I say?
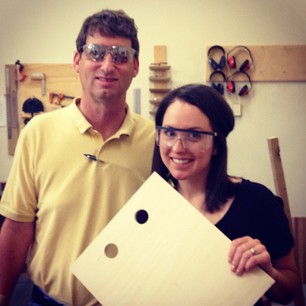
Speaking of being busy- Meryl and I have been working on a few of our own projects lately that we thought you might like to read about, beginning with a refinishing project (hence the title of the post).Â
Â
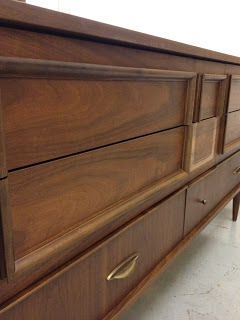
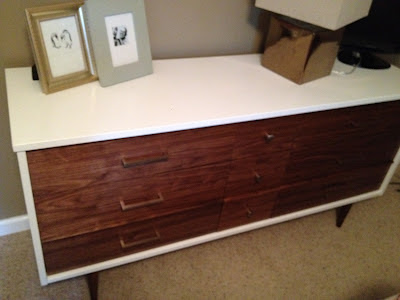
I found this little mid-century gem on Craigslist recently and immediately saw potential. I say potential, because although I loved the lines of the dresser and it was in great condition, I definitely did not love certain aspects (the plastic laminate top, the weird moulding pieces on the front and the hardware). By the way, the before pictures of the dresser are pretty bad. Please forgive me.
Plastic pretending to be wood, boo!
Â
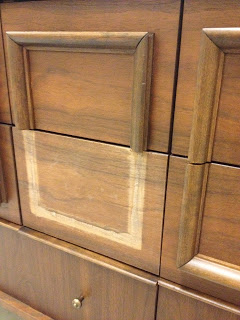
Working here has its benefits, meaning that I kept a dresser drawer at the front counter for a few days (maybe some of you saw it) and asked many a friendly customer for advice. Originally, after successfully removing the moulding from one of the drawer fronts with the help of a very nice customer (you know who you are) I decided that I might get away with simply sanding and refinishing the fronts. I had no such luck with the other drawers and by the end of the removal process I had a bit of a mess on my hands. It was a moment where I wondered what I had gotten myself into and had a twinge of buyer's remorse. What I have learned from much experience is that at these moments it is best to walk away from the project for a while, which is exactly what I did.
Â
Success
Â
Â
Opposite of success + wood filler = success?
Â
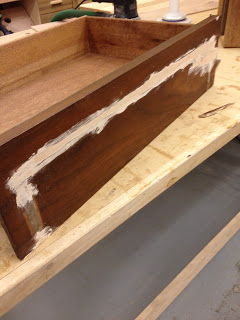
After essentially destroying the drawer fronts, I realized the only place to go from there was to re-veneer the fronts. I chose to re-veneer in walnut to match the nightstand I have been working on (almost finished, I swear.) Again, there is a bevy of experienced woodworkers here at Sears Trostel (customers included) who were happy to share their knowledge of veneering and turned the process into something I wasn't really expecting: a painless process.
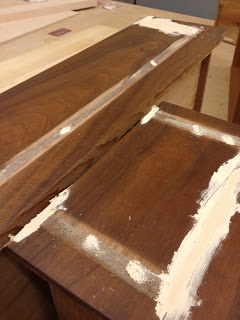
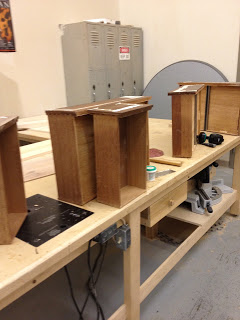
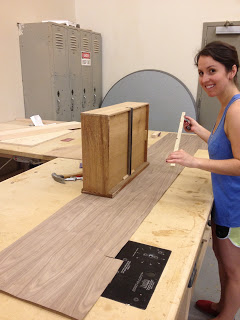
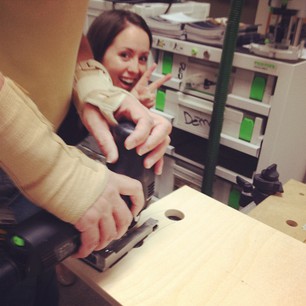
I spent two Saturday afternoons here in the shop, patching the drawer fronts, sanding, and applying the veneer. After that I needed only trim the veneer with a flush cut router bit et voila... (almost) brand new drawers. Â
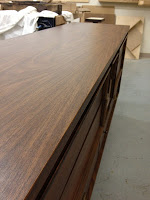
The plastic laminate was another issue; one solved with oil based primer and a quart of white paint. What do you think? Â
The plastic laminate was another issue; one solved with oil based primer and a quart of white paint. What do you think? Â
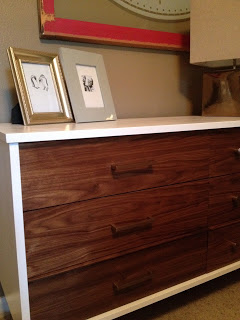
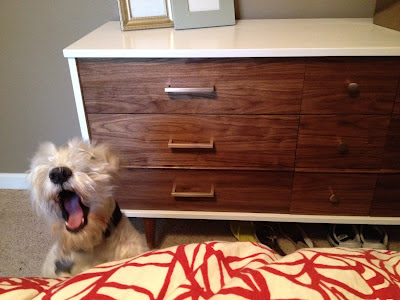
Phil likes it.
Walnut... why nut?
July 27, 2012
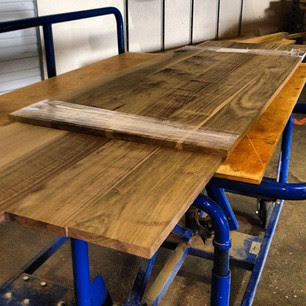
Natural wood is so beautiful and can be used for so many applications. Above are two walnut panels milled and laminated here at Sears Trostel by Meryl and Jim for an upcoming project. Anyone have any ideas of what this will be used for? It may not be what you are thinking... Check back next week for updates on their project.
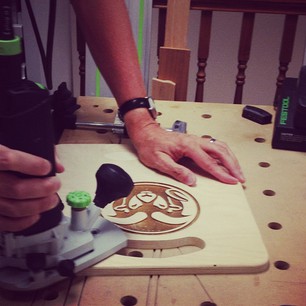
Nice saw blade carrier... (a DIY post)
July 13, 2012
Sears Trostel is a drop-off point for Rocky Mountain Sharp Shop. Many of you, having used their services in the past, must already know about this. For those who don't, check out their website to take a look at their services and prices (they even sharpened 2 pair of my sewing shears recently too).
On Thursday we had a drop off of 8 saw blades from one of our favorite (don't worry, you're all our favorites) customers, Uwe who works for CSU. Well, 8 saw blades stacked together are in a word, awkward, because they are heavy and sharp (and will soon be sharper). Curt was at the front counter, watching with a wary eye as I struggled to organize the blades when he made a brilliant but not original suggestion: Uwe, why don't you make a saw blade carrier out of plywood.  Uwe remarked that he liked the idea, but we all know he probably wasn't going to rush back to the shop to build one - he is a busy guy. So, Curt and I decided to make one for Uwe ourselves and in the process, show you all how easy it would be for you to make one as well.
Materials Needed:
1/2" thick plywood
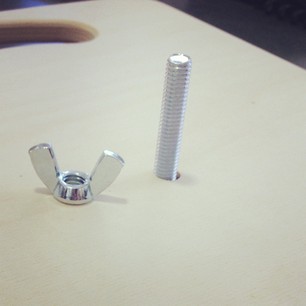
3/8" x 2-1/2" bolt & 3/8" wing nut
Step 1:
Decide on dimensions, pick material.
We chose to use 1/2" baltic birch plywood, 12" x 14"... the end product will look something like this:
*Spoiler alert: from experience, we recommend making the carrier 14" x 16" (which would accommodate both 10" and 12" blades)
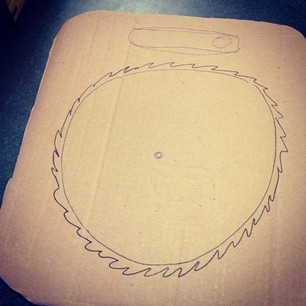
do you tire of my child-like drawings?
Â
you probably didn't need a picture of this step, right?
%20(3).JPG)
Curt Viehmeyer, the Terminator (note the glasses)
Â
Â
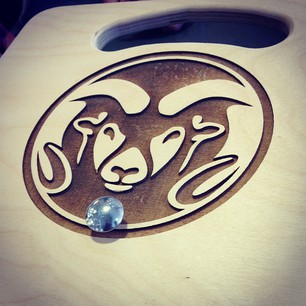
Because this was a gift, and because we were feeling fancy, we had the carrier laser engraved with CSU's logo on the back and our logo on the front. So pretty.
As a side note, the blades that Uwe dropped off were in fact, 12". What's the age old adage again- measure twice, cut once? Well, we just throw caution to the wind here at Sears Trostel and don't measure at all. You can see the blades peeking up in the above picture, not ideal but oh well. Lesson learned (maybe).  Â
Read More...
On Thursday we had a drop off of 8 saw blades from one of our favorite (don't worry, you're all our favorites) customers, Uwe who works for CSU. Well, 8 saw blades stacked together are in a word, awkward, because they are heavy and sharp (and will soon be sharper). Curt was at the front counter, watching with a wary eye as I struggled to organize the blades when he made a brilliant but not original suggestion: Uwe, why don't you make a saw blade carrier out of plywood.  Uwe remarked that he liked the idea, but we all know he probably wasn't going to rush back to the shop to build one - he is a busy guy. So, Curt and I decided to make one for Uwe ourselves and in the process, show you all how easy it would be for you to make one as well.
Materials Needed:
1/2" thick plywood
3/8" x 2-1/2" bolt & 3/8" wing nut
Step 1:
Decide on dimensions, pick material.
We chose to use 1/2" baltic birch plywood, 12" x 14"... the end product will look something like this:
*Spoiler alert: from experience, we recommend making the carrier 14" x 16" (which would accommodate both 10" and 12" blades)
do you tire of my child-like drawings?
Â
Step 2:
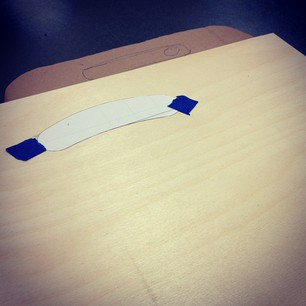
Draw a template of the handle, or more specifically, have Curt draw a template of the handle.
*Feel free to download a PDF of the template we used by clicking here
Tape and trace template onto the material you have chosen.
*Feel free to download a PDF of the template we used by clicking here
Tape and trace template onto the material you have chosen.
you probably didn't need a picture of this step, right?
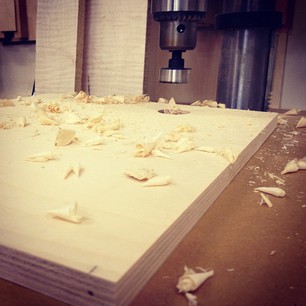
Step 3:
Cut plywood to final dimensions. Again, the dimensions we used were 12" x 14", assuming the blades the saw blade carrier will be holding are 10"... you know what they say about those who assume.
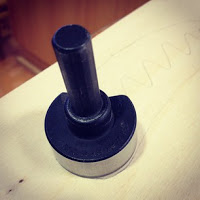
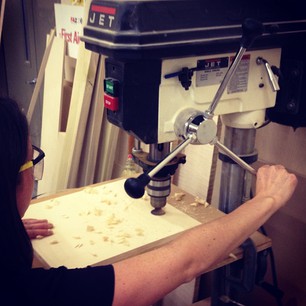
Step 4:
Use a drill press to cut out the ends of the handle; use a drill bit with a radius that matches the radius of the handle (1-3/8" for our template).
Â
Cut plywood to final dimensions. Again, the dimensions we used were 12" x 14", assuming the blades the saw blade carrier will be holding are 10"... you know what they say about those who assume.
Step 4:
Use a drill press to cut out the ends of the handle; use a drill bit with a radius that matches the radius of the handle (1-3/8" for our template).
Â
Curt Viehmeyer, the Terminator (note the glasses)
Â
Step 5:
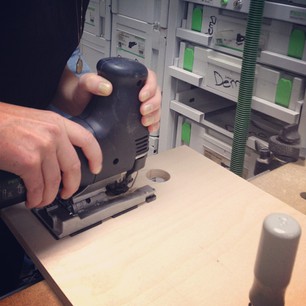
Use a jigsaw to cut out the rest of the handle. We used the Festool PS300 jigsaw and boy did it deliver. (This was my first experience with a jigsaw... I am earning power tool merit badges left and right!)
Use a jigsaw to cut out the rest of the handle. We used the Festool PS300 jigsaw and boy did it deliver. (This was my first experience with a jigsaw... I am earning power tool merit badges left and right!)
Step 6:
Use a spindle sander to smooth out the edges of the handle. Â
Sorry, no photos!
Step 7:
Use a bandsaw to round off the 4 corners of the carrier.
Sorry, no photos!
Step 8:
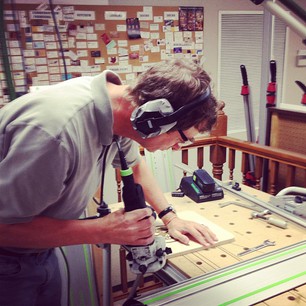
Use a router to round all edges of the carrier so that it's easier on the hands... remember, this will be heavy when there are sawblades bolted on.
Use a spindle sander to smooth out the edges of the handle. Â
Sorry, no photos!
Step 7:
Use a bandsaw to round off the 4 corners of the carrier.
Sorry, no photos!
Step 8:
Use a router to round all edges of the carrier so that it's easier on the hands... remember, this will be heavy when there are sawblades bolted on.
Â
Step 9:
Drill a hole in the center of the carrier that will fit the bolt you are using.Â
Â
Drill a hole in the center of the carrier that will fit the bolt you are using.Â
Â
...et voila!
Because this was a gift, and because we were feeling fancy, we had the carrier laser engraved with CSU's logo on the back and our logo on the front. So pretty.
Â
one satisfied customer
As a side note, the blades that Uwe dropped off were in fact, 12". What's the age old adage again- measure twice, cut once? Well, we just throw caution to the wind here at Sears Trostel and don't measure at all. You can see the blades peeking up in the above picture, not ideal but oh well. Lesson learned (maybe).  Â
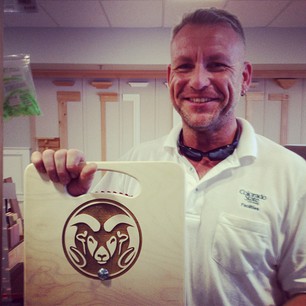
T-shirt Tuesday :)
July 10, 2012

The first round of shirts have made their way into our store and onto our backs!
Â
Â
Check it out...
%20(2).JPG)


Ken's daughter, Maya - future woodworker?
Â
Shop Talk with Dean Arneson
July 3, 2012

Sitting down over beers at Odell's Brewery with Dean Arneson on Friday the first question we asked was, What is your favorite woodworking joke?


Â


Â
Read More...
Â
He didn’t have one, but we do…
Â
Q: What do you call 50 people on the dance floor with no music?
A: 100 board feet.
Â
GET IT?Â
Â
As you all know, Meryl and I are strictly business so we had to get the jokes out of the way before we conducted our in-depth interview, asking the hard-hitting questions such as, What is your favorite wood and why, sir? (Dean likes purple heart because it finishes nicely.)
Â
Â
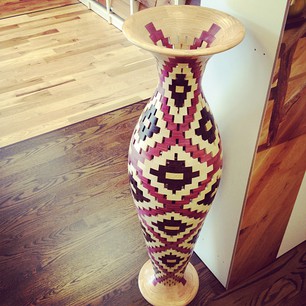
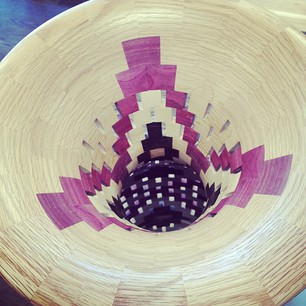
When I first met Dean at Sears Trostel about a month ago, I couldn’t help but notice his purchase of exotic woods like purple heart and (one of my personal favorites) zebrawood, which led me to ask what he does with such beautiful wood. Dean started talking to me about open-segmented vases that he makes using turned pieces of wood. I had a hard time visualizing what he was talking about (keep in mind that I am new to the woodworking world and know next to nothing about wood turning), so Dean got my email address and sent me pictures of these vases:
Â
I don't know about you, but I was pretty impressed, especially given the fact that Dean just began his woodworking career in December (as in 7 months ago). Originally from Boulder, Dean lived for 35 years in Glenwood Springs before spending 7 years working in Denver and finally moving to Loveland in November of last year. He first became interested in turning wood after going to a craft show at The Ranch with his father. Dean saw an open-segmented vase and as he says, was immediately interested in the "mystery" of it all. Shortly thereafter he began his self-taught journey, watching Denny Edwards videos online and purchasing a SegEasy jig and Wood Turner Pro Software. Using only his father's Shopsmith, Dean handcrafts his vases using more than 1000 pieces of turned wenge, purple heart, oak and maple. In the photos that Dean provided he is seen posing next to his vases to give viewers an idea of the scale. Each vase measures around 43-47" tall and takes over 70 hours to create; this is a man dedicated to his new-found love of wood turning.
 If you think Dean's vases are as beautiful as we do, you are in luck! For the next several weeks we will be showcasing one at our Riverside location, so come take a look. Dean is also part of the Locals Gallery Show at the Carbondale Mountain Fair at the end of July too if you would like to see more examples of his work.
Â
To inquire about purchasing a vase from Dean he can be contacted via email, or likewise he will be selling his vases on custommade.com in the near future.Â