A Father's Day how-to: Make the perfect pancake
By Erin Maceachern - October 13, 2017
It would make sense to post a how-to woodworking project this Father's Day but we think you woodworkers need to take a break from your shop and spend a little more time in the kitchen ;)  Maybe you question your prowess when it comes to cooking, but this recipe we are about to share came from none other than Curt Viehmeyer.  (If he can do it, you can too!)
And if you don't feel like trading in your shop apron for a kitchen apron, print this recipe out for your loved ones to make (it is Father's Day, after all).
Without further ado, Sears Trostel Lumber is proud to present to our dear customers a (formerly) top-secret recipe, also known as...
Â
Â
Â
 Wet IngredientsÂ


Â Â
  Â
Â


Â
3. Slowly stir wet mixture into dry ingredients until dampened- the batter should be slightly lumpy (not smooth!)
Â

Â


5. If you want to get fancy (like Curt), pour your batter into a sweet pancake dispenser like this one...
Â
6. Heat griddle or skillet to medium heat (cold water droplets should dance on the griddle when it is ready)- Pour 3 tablespoons of batter on the griddle for each pancake, leaving space for expansion. Turn gently when bubbles form throughout the pancake.
Â
 Â
 
7. Delicious Variation usingÂ
Debbie’s drizzle topping
Pour sauce in a squeeze bottle et voila! (so simple)
Drizzle Debbie's sweet syrup in pancake while it is cooking (before turning) Â
Â


8. Brown the other side of your pancakes and you are done! Serve with favorite topping: butter, syrup, peanut butter, jelly (the sky is the limit!)
YUM

Â

Â


Â
Read More...
And if you don't feel like trading in your shop apron for a kitchen apron, print this recipe out for your loved ones to make (it is Father's Day, after all).
Without further ado, Sears Trostel Lumber is proud to present to our dear customers a (formerly) top-secret recipe, also known as...
Â
THE WORLD’S BEST PANCAKES!
 Dry IngredientsÂ
- 1 cup all purpose flour
- 2 tablespoons sugar
- 2 teaspoons baking powder
- 3/4 teaspoon salt
Â
- 1 large egg - lightly beaten
- 3/4 cup milk
- 2 tablespoons vegetable oil
- 1 tablespoon vanilla extract
- 2 oz. cream cheese - softened to room temperature (plain or fruit flavored)
Â
Directions
1. Mix dry ingredients together well in a large mixing bowl and set asideÂ
 2. Mix egg, milk, vegetable oil and vanilla extract in a small bowl
Â
Â
Â
Â
Â
4. Fold in cream cheese
Â
Â
5. If you want to get fancy (like Curt), pour your batter into a sweet pancake dispenser like this one...
Â
6. Heat griddle or skillet to medium heat (cold water droplets should dance on the griddle when it is ready)- Pour 3 tablespoons of batter on the griddle for each pancake, leaving space for expansion. Turn gently when bubbles form throughout the pancake.
Â
 7. Delicious Variation usingÂ
Debbie’s drizzle topping
Ingredients
- 1 cup brown sugar
- 1/2 pint heavy cream
- 2 tablespoons melted butter
Pour sauce in a squeeze bottle et voila! (so simple)
Drizzle Debbie's sweet syrup in pancake while it is cooking (before turning) Â
Â
8. Brown the other side of your pancakes and you are done! Serve with favorite topping: butter, syrup, peanut butter, jelly (the sky is the limit!)
YUM
Â
9. Enjoy these delicious, fluffy pancakes with your favorite breakfast items... and with your favorite breakfast companions as well :)
Â
Â
Happy Father’s Day
P.S. You can find a printer-friendly pdf version of this recipe by clicking this link.  Happy eating!
Drumroll, Please
June 11, 2012
Have you all been waiting with bated breath?  We know, we know... winners were to have been announced last Friday.  (Sorry)
Everyone! Â That's right, each and every one of the seven people who wrote in with their best woodworking advice, even "safety first" (which... is not strictly speaking advice limited to woodworking). Â May this be a lesson to you all- next time enter our contests!!!
Â
Read More...
Â
Before you learn the winners, let me just say that our contest page got viewed quite a bit, but we only received 7 responses.  What gives?  Well, one of our customers (you know who you are) told me that he thinks people hesitated on giving advice for fear of not really knowing what they are talking about.  This can't be true! We know our customers are some of the best around, so next time we will expect more out of you!
Â
That said, all of the advice given was great and we appreciate it! Our favorite still has to be the first received, "All of my projects start out with a piece of firewood; many of them end that way as well..."
Â
Too funny!
Â
And now to announce the 3 winners of the t-shirts...
Everyone! Â That's right, each and every one of the seven people who wrote in with their best woodworking advice, even "safety first" (which... is not strictly speaking advice limited to woodworking). Â May this be a lesson to you all- next time enter our contests!!!
Â
Introducing the Sears Trostel Slim-Pin Coffee Table
Who knew making a table could be so much fun? (Probably a lot of you.)
June 7, 2012
Well, as promised- we put the first shipment of our hairpin legs to use this week. This table is also known as one of the easiest woodworking projects for a beginner ever, and way more satisfying than building a birdhouse. I should qualify this statement by saying that I really didn't do any of the hardwork. Michael out in the warehouse helped me pick out the lumber and then milled it all for me. I came in during phase 3 of the project, to help glue up the panel. My real contribution came in the way of sanding... I really dislike sanding, so give me a little credit.
.JPG)
About the table: The top is made from hard maple with an accent of zebrawood. It was finished with a General Finishes polyacrylic water based topcoat in semi-gloss. The edges have been rounded ever so slightly.
Â%20(1).JPG)
Essentially, the options are limitless when it comes to this table; it could be stained, have an inlay, be painted or made of reclaimed wood. For me, I wanted to keep it simple with clean lines, unstained wood and raw steel. Love.
-L.S.Â
Read More...
Nice to meet you, sir.
About the table: The top is made from hard maple with an accent of zebrawood. It was finished with a General Finishes polyacrylic water based topcoat in semi-gloss. The edges have been rounded ever so slightly.
Â
Harlan says all I need now is a green shag rug ;)
Essentially, the options are limitless when it comes to this table; it could be stained, have an inlay, be painted or made of reclaimed wood. For me, I wanted to keep it simple with clean lines, unstained wood and raw steel. Love.
-L.S.Â
Sourcing your materials (a.k.a. perseverance)
June 1, 2017

When undertaking a project, it's important to be creative. I've often found that picturing a product or specific application is easier than finding what you are looking for.
Take, for example my end table (are you getting sick of hearing about it yet?). I mentioned my love of all things mid-century modern and began a quest for a drawer pull that would fit with my original design. Of course Sears Trostel offers a wide selection of hardware from both Amerock and Top Knobs, so my search began here, scouring catalogs. There were several pulls that would have sufficed, but they weren't quite right. So my search took me to the Internet and several google searches (keywords: mid-century modern hardware, vintage hardware, vintage drawer pulls etc. etc.). I found a few online stores with what was described as mid-century modern hardware but still didn't see what I was looking for.
My last Internet stop was e-bay (I love e-bay) where I found a set of 6 round pulls in a dull bronze finish for less than $10 total. Not only are these Amerock pulls almost exactly what I had been picturing, but they are authentic- probably sold in the 60's. They came from the estate of a retired cabinet maker and are now a part of my treasured collection.
so shiny & old :)
Â

Love em'
Â
Read More...
Take, for example my end table (are you getting sick of hearing about it yet?). I mentioned my love of all things mid-century modern and began a quest for a drawer pull that would fit with my original design. Of course Sears Trostel offers a wide selection of hardware from both Amerock and Top Knobs, so my search began here, scouring catalogs. There were several pulls that would have sufficed, but they weren't quite right. So my search took me to the Internet and several google searches (keywords: mid-century modern hardware, vintage hardware, vintage drawer pulls etc. etc.). I found a few online stores with what was described as mid-century modern hardware but still didn't see what I was looking for.
My last Internet stop was e-bay (I love e-bay) where I found a set of 6 round pulls in a dull bronze finish for less than $10 total. Not only are these Amerock pulls almost exactly what I had been picturing, but they are authentic- probably sold in the 60's. They came from the estate of a retired cabinet maker and are now a part of my treasured collection.
so shiny & old :)
Â
Moral of the story: don't settle! Â
P.S.
Speaking of sourcing materials... look what UPS just delivered to us. It's Christmas in June! Check back next week to see the first completed project using the famed hairpin legs.
P.S.
Speaking of sourcing materials... look what UPS just delivered to us. It's Christmas in June! Check back next week to see the first completed project using the famed hairpin legs.
Love em'
Â
New Books at Sears Trostel
Like this one...
May 31, 2017
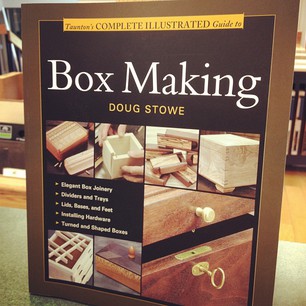
I have been reading this little gem, Box Making by Doug Stowe up at the front desk because (as you all know) a box making project is in my near future.
This is what Doug has to say about boxes, "A wooden box. What could be simpler? Yet what could be more profound? Boxes have become an art form and a way in which thousands of craftsmen express themselves through wonderful works in wood." And we certainly agree with him here at Sears Trostel; box making IS an art form, something I really need to remember as I embark on this first woodworking design project of mine.
Of course, construction of the box for the end table was something that Harlan and I discussed when I first showed him my plans. Would I choose to use a rabbet joint? A mortise-and-tenon joint? Would I dare attempt a mitered joint?  And by the way, what do all these terms mean?
Most of you are already probably pretty familiar with the different techniques used in woodworking to join two edges, but let me share with you briefly what I have learned. The diagrams I have drawn are representations of what the front of my end table would look like should I choose that specific joint. For my purposes any of the joints would work well, it is merely a matter of aesthetics.   Â
Rabbet Joint:
A rabbet joint denotes a cut or groove along the edge of a board , which creates a mechanical joint that is stronger than a butt-joint and allows for a surface area to glue your joining edge. Often these joints are reinforced with fasteners (nails or screws).
unlike a "rabbit" joint, this one won't hop around
Mortise and Tenon Joint:
This is the primary woodworking joint, which has been used for billions of years by woodworkers (according to my co-worker Steve). This joint is made up two components: the mortise hole and the tenon peg. The tenon is meant to fit snugly in the mortise hole. They are typically strong because of the increased glue surface area and because of the mechanical connection. There are many different methods to make mortise and tenon joints. Our favorite tool at Sears Trostel is the Festool Domino, which is a specialized mortising machine that is user friendly (good for a beginner like me).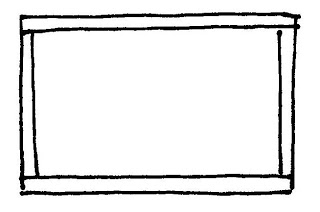
Looks like a butt joint! But it's not a butt, it's a mortise and tenon!
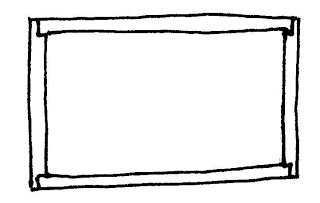
Miter Joint:
A miter joint is a joint created when the two edges being joined are beveled (usually at a 45 degree angle). These edges are then glued together but because the grain in a miter joint is a combination of end and long grain, the glue bond is "less than ideal", resulting in a relatively weak joint. Typically, mitered joints are best used for smaller applications (think picture frames and small boxes). Mitered joints, like rabbet joints, are often reinforced with fasteners.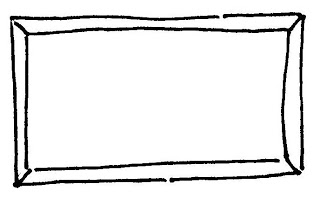
Let's pretend I used a ruler
However, because we are also interested in aesthetics... I will say that this is my preferred joint for the end table that I am making.
In conclusion, I hope this has been informative to all you (10) loyal readers out there. Hi Mom! If you want to learn more about box making, come buy this book or just ask me, the new expert on all things box related. Â
Read More...
This is what Doug has to say about boxes, "A wooden box. What could be simpler? Yet what could be more profound? Boxes have become an art form and a way in which thousands of craftsmen express themselves through wonderful works in wood." And we certainly agree with him here at Sears Trostel; box making IS an art form, something I really need to remember as I embark on this first woodworking design project of mine.
Of course, construction of the box for the end table was something that Harlan and I discussed when I first showed him my plans. Would I choose to use a rabbet joint? A mortise-and-tenon joint? Would I dare attempt a mitered joint?  And by the way, what do all these terms mean?
Most of you are already probably pretty familiar with the different techniques used in woodworking to join two edges, but let me share with you briefly what I have learned. The diagrams I have drawn are representations of what the front of my end table would look like should I choose that specific joint. For my purposes any of the joints would work well, it is merely a matter of aesthetics.   Â
Rabbet Joint:
A rabbet joint denotes a cut or groove along the edge of a board , which creates a mechanical joint that is stronger than a butt-joint and allows for a surface area to glue your joining edge. Often these joints are reinforced with fasteners (nails or screws).
unlike a "rabbit" joint, this one won't hop around
Mortise and Tenon Joint:
This is the primary woodworking joint, which has been used for billions of years by woodworkers (according to my co-worker Steve). This joint is made up two components: the mortise hole and the tenon peg. The tenon is meant to fit snugly in the mortise hole. They are typically strong because of the increased glue surface area and because of the mechanical connection. There are many different methods to make mortise and tenon joints. Our favorite tool at Sears Trostel is the Festool Domino, which is a specialized mortising machine that is user friendly (good for a beginner like me).
Looks like a butt joint! But it's not a butt, it's a mortise and tenon!
A miter joint is a joint created when the two edges being joined are beveled (usually at a 45 degree angle). These edges are then glued together but because the grain in a miter joint is a combination of end and long grain, the glue bond is "less than ideal", resulting in a relatively weak joint. Typically, mitered joints are best used for smaller applications (think picture frames and small boxes). Mitered joints, like rabbet joints, are often reinforced with fasteners.
Let's pretend I used a ruler
However, because we are also interested in aesthetics... I will say that this is my preferred joint for the end table that I am making.
In conclusion, I hope this has been informative to all you (10) loyal readers out there. Hi Mom! If you want to learn more about box making, come buy this book or just ask me, the new expert on all things box related. Â