After Google SketchUp: Making of the end table PART 1 (choosing lumber)
May 30, 2012
Let the great box-making project begin!  You remember the box I am talking about, right? ...The one that will soon be sitting next to my bed with a lamp and alarm clock on it. Well, I think I've successfully wrangled Harlan into helping me complete this project (and it didn't even require bribery). Having a mentor and a picture of my end product is the starting point. As I said, I am a complete novice and really don't know where to begin but I am great at asking questions and taking directions :)
Â
Step 1: Determining the type of lumber I want to use
This is an easy one- walnut! I have always loved the look of walnut and even though the SketchUp rendering was done in cherry, I really have envisioned a darker wood with brushed silver or brass hardware. Â
Step 2: Determining how much lumber I will need for my project
This should be easy, right? Maybe not, as I learned.
Take a look at the diagram that I sketched up (by hand) to illustrate calculating board footage. I focused first on the box, ignoring the drawer front and the back panel. At this point, I still hadn't decided if I would use solid wood or plywood for the back panel (more about that later...).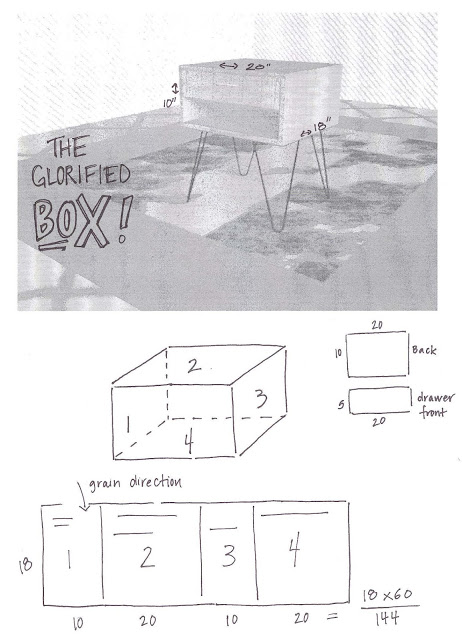
what a beautiful sight
Â
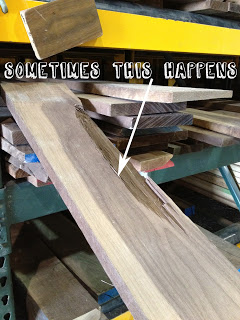
Or you may notice something like this:Â
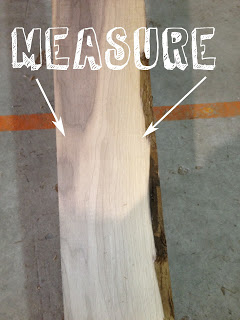
Of course, we always strive to provide the best quality lumber to our customers but these things sometimes "just happen". This is typical in the lumber industry so just be prepared to dig around a little bit. However, keep in mind that a board like this can still be used. For example, you can cut out the portion of the board that is flawed and still use the material that is around it. For critical width dimensions, be sure that you measure your pieces at the point where the board will be the smallest...
Â
Step 4: Check your measurements
We all know the age-old adage: measure twice, cut once... So, to be sure that I had the correct amount of material I used a white crayon to mark where I would make my cuts on the boards that I had chosen. Success. I ended up with two boards totaling 16 board feet that will yield three pieces at 6.5" x 62", with a considerable amount of wood left over that will make the back panel and drawer front.
To be continued...
Read More...
Â
Our first lesson: Wax on, Wax off
Step 1: Determining the type of lumber I want to use
This is an easy one- walnut! I have always loved the look of walnut and even though the SketchUp rendering was done in cherry, I really have envisioned a darker wood with brushed silver or brass hardware. Â
Step 2: Determining how much lumber I will need for my project
This should be easy, right? Maybe not, as I learned.
Take a look at the diagram that I sketched up (by hand) to illustrate calculating board footage. I focused first on the box, ignoring the drawer front and the back panel. At this point, I still hadn't decided if I would use solid wood or plywood for the back panel (more about that later...).
I am a visual learner, so drawing this sort of diagram was a beneficial way for me to calculate roughly the amount of lumber I would be looking for to construct the box. The dimensions of the box are 18" x 60", so I will be using 7.5 board feet of 4/4 walnut. Of course, when calculating board footage you need to account for the waste factor. As I have learned, accounting for waste factor will depend on the wood you are using; species and condition (it can range from an additional 10-30%). Because I am using walnut and don't want to use any pieces with sapwood I calculated an additional 30%, or around 10 board feet total.
Step 3: Picking out the lumber
With this drawing in hand I went out to inspect our stock of 4/4 walnut with Harlan. We decided that the best plan of action would be to find boards that would net at least 6.5" x 62". This represents approximately one third of the width (18") and the entire length (60"), meaning I would need to find at least three boards that can be glued up to make the four pieces of the box.
Am I making sense here?  Good!Â
what a beautiful sight
Step 3a: Have fun sorting through lumber!
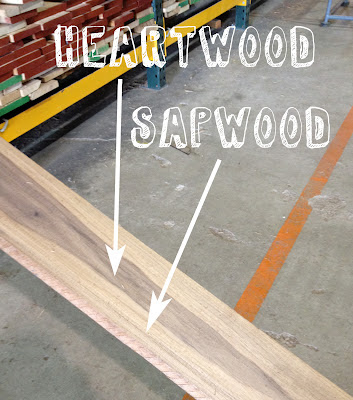
It's important to have a good idea of your application when selecting your lumber. I will just say that while I like sapwood, I decided that for this project I wanted to avoid it. The bedside table is fairly small and I thought that having too much variance in the wood might be distracting to the eye. That said, sapwood is a naturally occurring characteristic of walnut and selecting for only heartwood makes for a decidedly harder process (also more expensive, more waste product). But I want my first project to turn out just as I have envisioned, so a girl has to be willing to dig through a whole bin of walnut (and brave splinters to boot).
It's important to have a good idea of your application when selecting your lumber. I will just say that while I like sapwood, I decided that for this project I wanted to avoid it. The bedside table is fairly small and I thought that having too much variance in the wood might be distracting to the eye. That said, sapwood is a naturally occurring characteristic of walnut and selecting for only heartwood makes for a decidedly harder process (also more expensive, more waste product). But I want my first project to turn out just as I have envisioned, so a girl has to be willing to dig through a whole bin of walnut (and brave splinters to boot).
Â
 *Helpful tips when selecting lumber
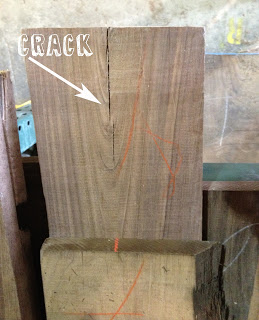
When you measure, make sure you are inspecting the board (both sides). You may need to take into account small flaws in the lumber like end splits at the end of the board...
When you measure, make sure you are inspecting the board (both sides). You may need to take into account small flaws in the lumber like end splits at the end of the board...
Or you may notice something like this:Â
Of course, we always strive to provide the best quality lumber to our customers but these things sometimes "just happen". This is typical in the lumber industry so just be prepared to dig around a little bit. However, keep in mind that a board like this can still be used. For example, you can cut out the portion of the board that is flawed and still use the material that is around it. For critical width dimensions, be sure that you measure your pieces at the point where the board will be the smallest...
Â
Step 4: Check your measurements
We all know the age-old adage: measure twice, cut once... So, to be sure that I had the correct amount of material I used a white crayon to mark where I would make my cuts on the boards that I had chosen. Success. I ended up with two boards totaling 16 board feet that will yield three pieces at 6.5" x 62", with a considerable amount of wood left over that will make the back panel and drawer front.
To be continued...
t-shirt giveaway extravaganza bonanza
May 27, 2012

Hey customers!  If you are reading this blog right now, thanks!  To show you how much we appreciate your support, we want to give you the opportunity to be one of the first to wear a new Sears Trostel t-shirt.  To qualify to win a FREE shirt all you have to do is comment on this post and give your best piece of woodworking advice.  We want to hear what you have to say- so be creative and we will pick the 3 comments we like the best.
Please comment by Thursday, June 7th and we will announce the winners the following Friday. Â Good luck! Â (Sorry Mom, you can't win...)
Please comment by Thursday, June 7th and we will announce the winners the following Friday. Â Good luck! Â (Sorry Mom, you can't win...)
The creative process: making t-shirts
By Laine Saks - May 27, 2012
A few days ago we posted a teaser about new t-shirt design ideas. Â Well, we can confirm that these shirts will actually go into production later this week. Â We are going to do a limited run and wait to hear back from customers, but we really hope you like what we came up with (we sure think they're great).
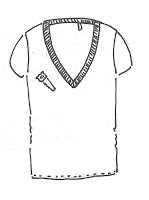
the ladies' edition :)Â
.jpg)
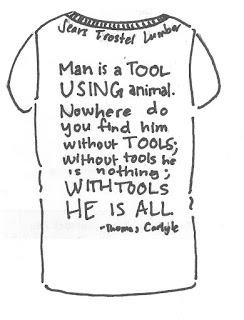
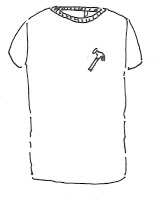
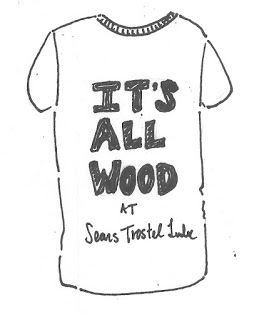
it's all wood
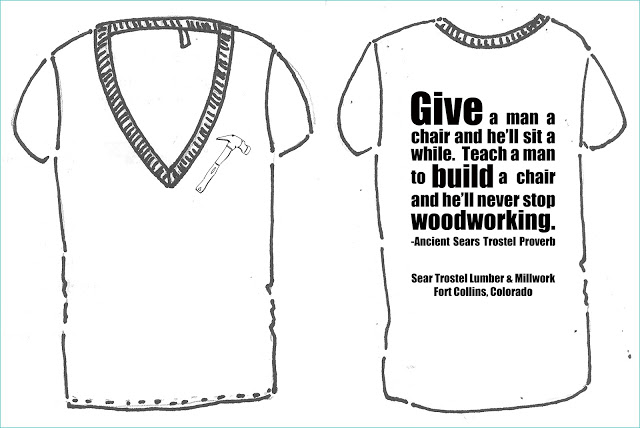
the fake proverb v-neck
Our good friends at Encore Apparel (just a block away from us on Riverside) are helping us turn these drawings into real t-shirts that we are going to sell in our store.  YAY!
Â
Read More...
Â
Because we know a lot of our customers own small businesses (and t-shirts are great promotional tools), Meryl and I thought we would share a little bit with you about the design process. Â When I first began school I was an apparel design major for 2 years, so just know that I always have little ideas floating around in my brain and I am secretly daydreaming about sewing. Â The first week of working here at Sears Trostel I found myself doodling design ideas and concepts for t-shirts and fun sayings. Â Here they are:
the ladies' edition :)Â
We all know how easy it would be to slap our logo and address on a t-shirt and call it a day, but Meryl and I both wanted to come up with shirts that would grab peoples' attention, and maybe even make them laugh a little. Â Using my ideas, initial sketches and Photoshop we now have this:
Â
Â
it's all wood
the fake proverb v-neck
Our good friends at Encore Apparel (just a block away from us on Riverside) are helping us turn these drawings into real t-shirts that we are going to sell in our store.  YAY!
Â
Have a safe and happy Memorial Day weekend!
Â
Â
Google SketchUp: a great (free) investment for furniture design
May 24, 2012
One of the greatest things about working for Sears Trostel and talking to woodworkers all day long is the plethora of knowledgeable craftsmen I have at my disposal.
So, yesterday I started playing around with design ideas for a modern stream-lined nightstand (which could easily double as a living room end table). I am a complete novice at furniture design (and woodworking) but I know what I like, and that is a mid-century modern design.
With that in mind, I started talking to Harlan who is the resident woodworking guru and class instructor at Sears Trostel. I began with a vision, worked out rough dimensions and then sketched this out by hand: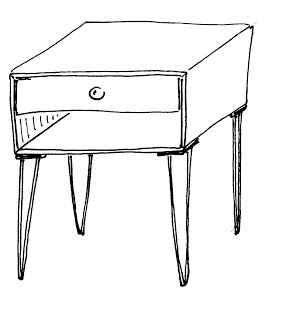
Clean lines make me happy :)
Pretty basic, but you get the idea. Yep, it's a glorified box with a drawer and hairpin legs (I am obsessed with hairpin legs). Â
I had this drawing sitting up at the front counter when I was helping a customer and he remarked, "Gee, looks like someone draws about as well as I do. That's why I use Google SketchUp." Laughter ensued. Obviously, I didn't take offense with this comment but realized he was probably on to something. So, this morning Meryl sat down with me and turned my sketch into this:
Â
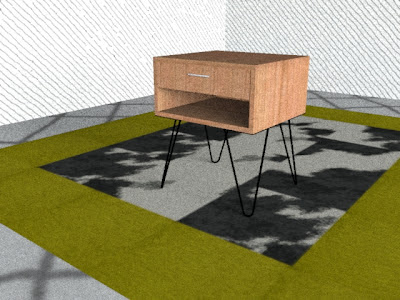
Rendering 1 in cherry
And this too:
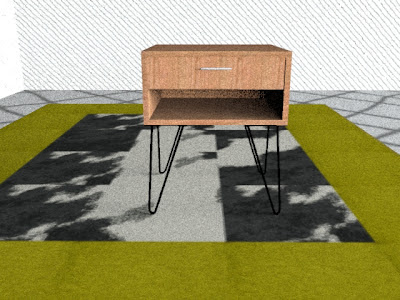
Rendering 2 in cherry
Â
.JPG)
The cardboard box "box"
Read More...
So, yesterday I started playing around with design ideas for a modern stream-lined nightstand (which could easily double as a living room end table). I am a complete novice at furniture design (and woodworking) but I know what I like, and that is a mid-century modern design.
With that in mind, I started talking to Harlan who is the resident woodworking guru and class instructor at Sears Trostel. I began with a vision, worked out rough dimensions and then sketched this out by hand:
Clean lines make me happy :)
Pretty basic, but you get the idea. Yep, it's a glorified box with a drawer and hairpin legs (I am obsessed with hairpin legs). Â
I had this drawing sitting up at the front counter when I was helping a customer and he remarked, "Gee, looks like someone draws about as well as I do. That's why I use Google SketchUp." Laughter ensued. Obviously, I didn't take offense with this comment but realized he was probably on to something. So, this morning Meryl sat down with me and turned my sketch into this:
Â
Rendering 1 in cherry
And this too:
Rendering 2 in cherry
Â
Meryl has a degree in interior design and loads of experience with SketchUp and Revit, so it was a really simple and painless process for her to build a 3D model of my end table design. An hour later, I now know the basics of how to use Google SketchUp and have a rendering that (hopefully) won't be laughed at by customers. The program is so easy to use, you may want to download it and play around with your own design ideas. Click here to download a free version. There are a lot of tutorials out there on the web too- this is Meryl's favorite online tutorial website (she is a self-taught expert).
After having made the 3D rendering I decided it was probably a good idea to make a to-scale model out of corrugated cardboard and some hard maple turning blocks we keep in stock in the warehouse. Remember, I am a complete novice at furniture design... In order to fully visualize the end product I need to see the end product, and scavenged cardboard and packaging tape was the easiest route for me. Having seen what the end table would look like (keeping in mind the maple blocks are not the correct height) I was able to make some needed tweaks to the design before making the real product out of wood (I am thinking walnut). Â
After having made the 3D rendering I decided it was probably a good idea to make a to-scale model out of corrugated cardboard and some hard maple turning blocks we keep in stock in the warehouse. Remember, I am a complete novice at furniture design... In order to fully visualize the end product I need to see the end product, and scavenged cardboard and packaging tape was the easiest route for me. Having seen what the end table would look like (keeping in mind the maple blocks are not the correct height) I was able to make some needed tweaks to the design before making the real product out of wood (I am thinking walnut). Â
The cardboard box "box"
I have enlisted Harlan in this project... he just doesn't know it yet ;)
We love you Dad.
May 23, 2012
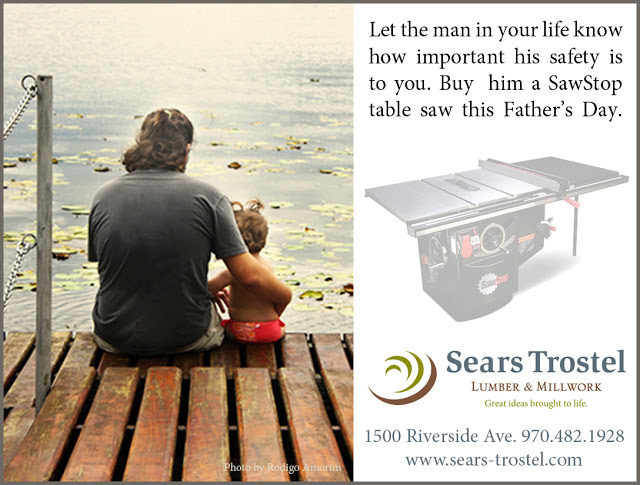
Father's Day is less than 4 weeks away... have you bought your father or husband anything yet? Our suggestion: SawStop table saw. If that's out of your price range how about a gift card (he can pay the balance)?
Check our latest ad running in the Coloradoan beginning next week. Nice, eh? Â
Check our latest ad running in the Coloradoan beginning next week. Nice, eh? Â